Quick Answer
- Most “blown” car amplifiers are not dead: a failed fuse, a bad ground, a low supply voltage or a shorted speaker wire causes the same symptoms, so rule those out first.
- Check the fuses, then measure power, ground and remote voltage; an amplifier needs roughly 12 to 14.4 volts at its terminals and a remote signal of about 11 to 14 volts (DS18, 2025).
- Protect mode that clears with the speakers disconnected points to the wiring or a speaker, not the amplifier.
- A popping sound, a burning smell or smoke usually means an internal failure (Rockford Fosgate, 2022); the parts that fail most often are the output transistors and the power-supply MOSFETs.
- Cracked solder joints and loose terminals are DIY repairs; failed output stages or power supplies are bench repairs, and on budget amplifiers replacement is often cheaper.
To fix a blown car amplifier, start by proving it is actually blown. Check the fuses, measure the power, ground and remote turn-on voltage, clear protect mode by disconnecting the speakers, and only then open the case to inspect the circuit board. Many amplifiers written off as blown are fine behind a failed fuse or a loose ground wire, and the checks below also show where a DIY repair ends and a bench repair begins.
Signs Your Car Amplifier Is Blown
A blown car amplifier usually shows one of four symptoms: no power light at all, a protect light that will not clear, a fuse that fails the moment you power it up, or a burning smell. Distortion or one dead channel can also point to internal damage, but those symptoms have external causes more often than internal ones.
| Symptom | Most likely cause | Start with |
|---|---|---|
| No power light, no sound | Blown fuse, no remote signal, bad ground | Steps 1 and 2 |
| Protect light stays on | Shorted speaker wire, impedance too low, overheating, internal fault | Step 3 |
| Fuse blows instantly at power-up | Shorted output transistors or power-supply MOSFETs | Steps 1 and 5 |
| One channel silent or distorted | RCA fault, speaker fault or a failed channel | Step 4 |
| Popping, burning smell or smoke | Internal component failure | Step 5 |
| Cuts out after a few songs | Overheating or voltage drop | Steps 2 and 3 |
Rockford Fosgate’s guide to car amplifier problems and repair lists a strange popping noise, a burning smell or smoke as the signs of a severely damaged amplifier that needs service (Rockford Fosgate, 2022). If you see smoke, disconnect power at the battery before doing anything else.
What You Need Before You Start
You need a digital multimeter, spare fuses of the correct rating, a set of screwdrivers and hex keys, a known-good pair of RCA cables, and a test tone or familiar track. For work inside the case, add a soldering iron, solder, flux, isopropyl alcohol and a magnifier or phone camera for close inspection.
Disconnect the battery’s negative terminal before you remove the amplifier or open its case. Car amplifiers store energy in large filter capacitors, and a slipped probe on a live board can destroy parts in a fraction of a second. If the amplifier is still under warranty, check the terms before opening it, because breaking a warranty seal usually voids coverage.
Step 1: Check Every Fuse in the Power Path
Check the amplifier’s onboard fuses and the main inline fuse near the battery first. Pull each fuse and look for a broken element, then confirm with the multimeter on its continuity or ohms setting: a good fuse beeps or reads close to zero ohms, and a blown one reads OL (open line).
Replace a blown fuse with one of exactly the same rating. Never fit a larger fuse to stop it blowing, because the fuse protects the wire and the amplifier from a fault that is still there.
What happens next tells you a lot. A fuse that blew once after a loose power wire touched the body usually means the amplifier survived. A new fuse that blows the instant you power up means something inside is shorted, most often the output transistors or the power-supply MOSFETs. Stop there and move to Step 5 rather than feeding it more fuses.
Step 2: Measure Power, Ground and Remote Voltage
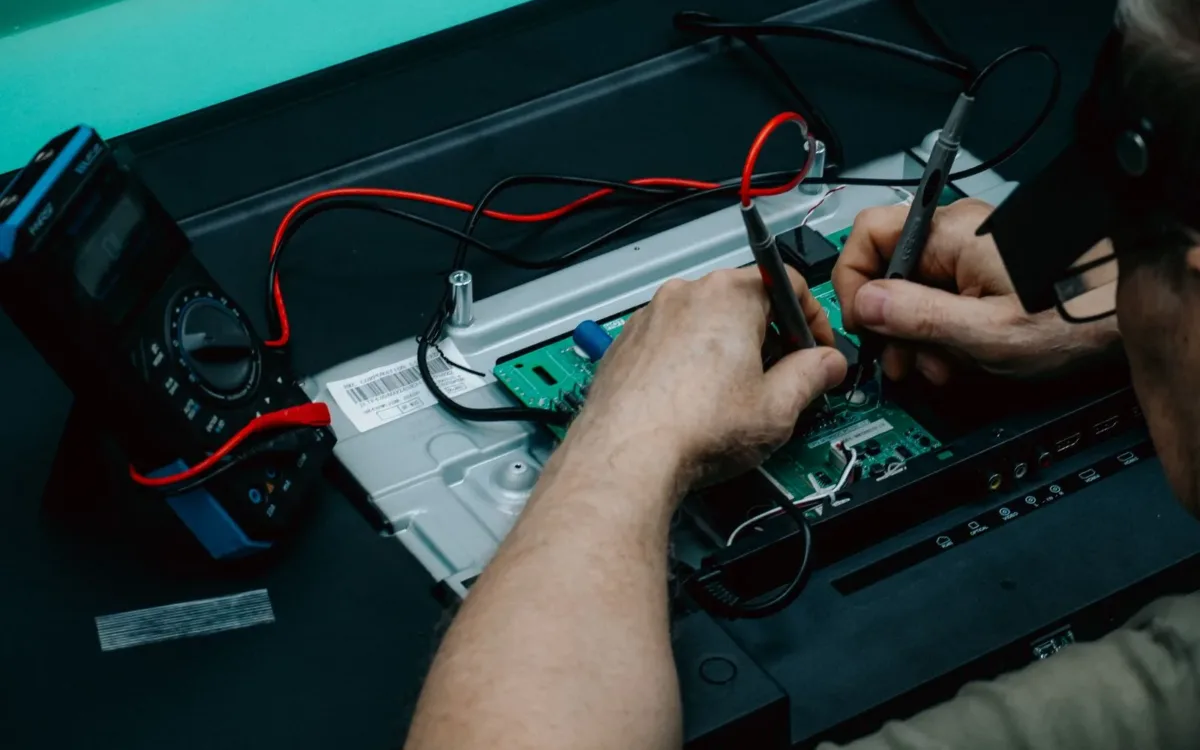
With the system on, measure DC voltage between the amplifier’s power (B+) and ground (GND) terminals, then between the remote (REM) and ground terminals. Expect roughly 12 to 14.4 volts on power and about 11 to 14 volts on remote while the head unit is on (DS18, 2025).
A reading of zero on power means a blown inline fuse, a broken power wire or a failed connection at the battery. A normal power reading with zero on remote means the amplifier is never told to turn on: check the remote wire at the head unit and anywhere it passes through a connector.
The ground matters as much as the power wire. Keep it short, under 18 inches, and bolted to bare metal (DS18, 2025). Sand off paint, use a star washer, and make sure the ground cable is the same gauge as the power cable. For every test and the readings to expect, see our full guide on how to test a car amplifier with a multimeter.
Step 3: Clear Protect Mode by Isolating the Speakers
If the protect light is on, disconnect every speaker wire from the amplifier and power it up again. If the light clears, the amplifier is fine and the fault is in the speaker wiring or a speaker. If it stays on with nothing connected, the problem is inside the amplifier or in its power supply.
With the speakers disconnected, look for these common external causes:
- A speaker wire strand touching the car body, a seat rail or a screw inside the door.
- A total impedance below the amplifier’s minimum; two 2-ohm subwoofers wired in parallel present 1 ohm, which many amplifiers cannot drive.
- A speaker with a shorted voice coil, which reads close to zero ohms across its terminals.
- An amplifier that is overheating because it is mounted under carpet, in direct sun or with no airflow.
Step 4: Isolate Channel and Signal Problems
If one channel is silent or distorted, swap the RCA cables between channels at the amplifier. If the problem moves with the cable, the fault is in the cable or the head unit’s output. If it stays on the same amplifier channel, that channel has failed.
Repeat the test at the output side by swapping the speaker wires between two channels. A problem that follows the speaker is a speaker fault; one that stays put is an amplifier fault. Also check the head unit’s balance, fader and subwoofer output settings, since a fader set fully forward looks exactly like dead rear channels.
Step 5: Open the Amplifier and Inspect the Circuit Board
If the amplifier still fails after the external checks, remove it from the car, open the case and inspect the board under good light. Look for scorched components, black soot on transistors, bulging or leaking capacitors, burned resistors and cracked solder joints.
Cracked solder joints are the most common DIY-repairable fault. Check the joints on heavy or stressed parts: the power and speaker terminal blocks, the RCA jacks, large capacitors and anything that runs hot. A ring-shaped crack around a component lead can cause intermittent cutting out that looks like a much bigger failure.
Step 6: Repair the Faults You Can Fix Safely
Repair what is within reach of basic tools: reflow cracked solder joints, replace damaged terminal blocks, fix broken RCA jacks and replace blown internal fuses. These repairs cost little and fix a large share of intermittent faults.
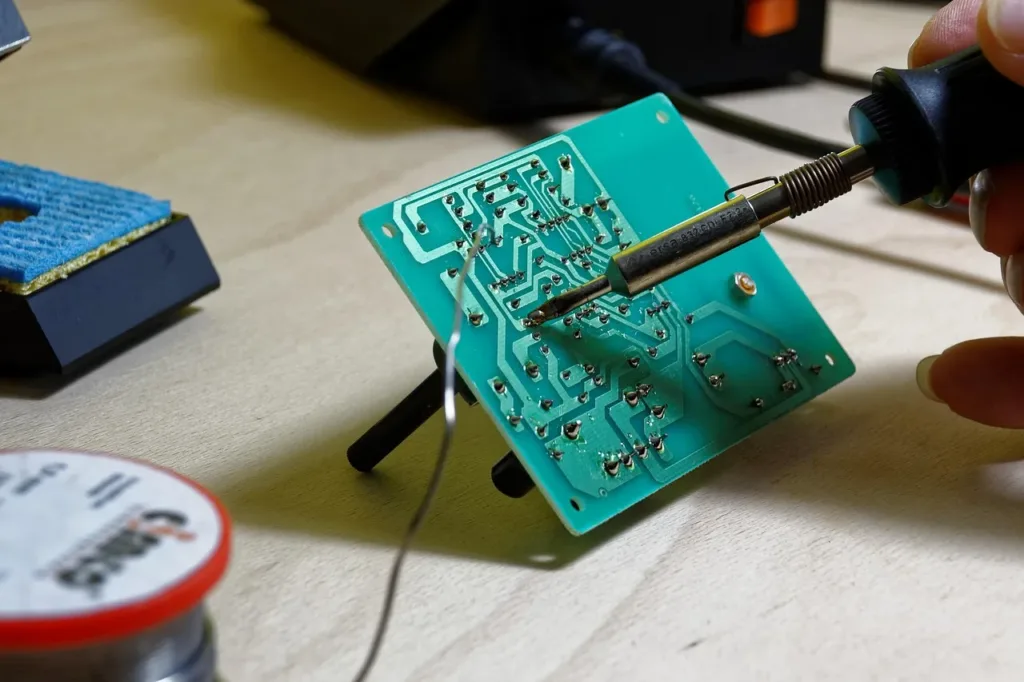
To reflow a joint, clean it with isopropyl alcohol, add a little flux, heat the pad and lead together, and feed in fresh solder until it forms a smooth cone. Let it cool without moving the board, then inspect it under magnification.
Should You Repair or Replace a Blown Car Amplifier?
Repair the amplifier when the fault is external or simple, when it is still under warranty, or when it is a higher-end model worth a bench repair. Replace it when a budget amplifier has a failed power supply or output stage, because parts and labor often cost close to a new unit.
| Fault | DIY repair? | Usual best option |
|---|---|---|
| Blown fuse, bad ground, loose power wire | Yes | Fix the wiring |
| Protect mode from a shorted speaker wire | Yes | Repair the wire |
| Cracked solder joint or loose terminal | Yes, with a soldering iron | Reflow or replace the terminal |
| Failed output transistors | Advanced | Bench repair or replace |
| Failed power-supply MOSFETs | Advanced | Bench repair or replace |
| Water damage or burned board | No | Replace |
How to Keep a Repaired Amplifier From Blowing Again
Reinstall the amplifier with correct wiring, a clean ground and properly set gain. Most repeat failures come from putting a repaired amplifier back into the exact conditions that damaged it.
- Fuse the power wire close to the battery with the rating the wire needs.
- Use a ground cable of the same gauge as the power cable, kept short and bolted to bare metal.
- Confirm the final speaker impedance is at or above the amplifier’s rated minimum.
- Set the gain with a test tone rather than by ear at full volume; our guide on how to tune your car amplifier shows the method.
- Mount it where air can move around the heatsink, away from water.
- Match the amplifier’s power to the speakers; our guide on how to choose an amplifier for car speakers explains the numbers.
Frequently Asked Questions About Fixing a Blown Car Amplifier
How do I know if my car amp is blown?
Check for a power light, a protect light and blown fuses first. If the fuses are good, power and remote voltage are present, and the amplifier stays in protect with no speakers connected, it has likely failed internally. A burning smell, smoke or a fuse that blows instantly also points to internal damage.
Can a blown car amplifier be fixed?
Often, yes. External faults such as fuses, grounds and speaker wiring are easy to fix, and cracked solder joints can be reflowed at home. Failed output transistors or power-supply MOSFETs need a bench repair, which is usually worth it only for higher-end amplifiers.
Why does my amp keep blowing fuses?
A fuse that blows the moment you power up usually means a short inside the amplifier, most often in the output stage or power supply. A fuse that blows only at high volume can mean an undersized fuse, a load below the amplifier’s minimum impedance, or a power wire rubbing against metal.
What does it mean when an amp goes into protect mode?
Protect mode shuts the amplifier’s output down to prevent damage. The usual triggers are a shorted speaker wire, an impedance that is too low, overheating or low supply voltage. Disconnect the speakers to see whether the fault is external or inside the amplifier.
Can a blown amp damage my speakers?
Yes. An amplifier with shorted output transistors can put its full supply voltage across the speaker terminals, which can push the cone hard against its limits and burn the voice coil. Disconnect speakers from an amplifier you suspect is damaged until it has been repaired and tested.
Summary: How to Fix a Blown Car Amplifier
- Check every fuse, then measure power, ground and remote voltage before assuming the amplifier failed.
- Disconnect the speakers to clear protect mode and find wiring or impedance faults.
- Swap RCA cables and speaker wires between channels to isolate a single dead channel.
- Inspect the board for soot, bulging capacitors and cracked joints; reflow joints, but leave output stages and power supplies to a bench technician.
- Reinstall with correct wiring, impedance and gain so the repair lasts.