TL;DR
- Most car subwoofer problems are power, ground, fuse, signal or amplifier faults, not a dead driver, so check the wiring before you pull the subwoofer out.
- Test the voice coil with a multimeter on the ohms setting: a healthy 4-ohm coil usually reads around 3 to 3.6 ohms, an open circuit (OL) means a blown coil, and near zero means a short.
- An amplifier in protect mode usually points to a shorted speaker wire, a load below its stable impedance, overheating or a poor ground.
- Small surround tears can be repaired with flexible adhesive such as RTV silicone; a burned or rubbing voice coil needs a recone kit or a replacement subwoofer.
- Prevent repeat failures by setting gain with a test tone, turning off bass boost and using a subsonic filter on ported boxes.
To fix a subwoofer in your car, work from the easiest checks to the hardest: power and fuses first, then the signal from the head unit, then the amplifier, and only then the subwoofer itself. Most “blown subwoofers” turn out to be a loose remote wire, a blown fuse or an amplifier in protect mode, and those fixes take minutes.
You need a multimeter, basic hand tools and about an hour. The steps below tell you what each test result means and what to do next.
Identify the Symptom First
Start by matching what you hear to its likely cause, because each symptom points to a different part of the system. A subwoofer with no sound at all is usually a power or signal fault, while distortion, scraping or a burning smell points to the subwoofer itself.
| Symptom | Most likely cause | Where to start |
|---|---|---|
| No sound, amplifier light off | No power, blown fuse or missing remote signal | Step 1 |
| No sound, amplifier light on | Signal, settings or a disconnected speaker wire | Steps 2 and 3 |
| Amplifier protect light on | Short, impedance too low, overheating or bad ground | Step 3 |
| Sound cuts in and out | Loose ground, weak power connection or overheating amp | Steps 1 and 3 |
| Distorted, crackling or farting bass | Clipping, damaged surround or voice coil rub | Steps 4 and 5 |
| Scraping sound when the cone moves | Voice coil rubbing on the magnet gap | Step 5 |
| Burning smell after loud playback | Overheated voice coil | Step 4 |
| Weak bass, sub barely moving | Wrong settings, one coil disconnected, or partial damage | Steps 2 and 4 |
If the only problem is a thump or pop when the car starts, that is a turn-on timing issue rather than a fault; our guide on why your system pops when the car starts covers it.
Step 1: Check Power, Ground and Fuses
Check that the amplifier is getting power, ground and a remote turn-on signal. With the stereo on, measure between the amplifier’s power and ground terminals: you should see about 12.6 volts with the engine off and roughly 13.8 to 14.4 volts with it running. Then measure between the remote and ground terminals, which should read close to the same voltage.
If the power reading is zero, check the main fuse near the battery and any fuses on the amplifier itself. A blown main fuse often means the power wire has shorted to the body somewhere along its route, so inspect the wire where it passes through the firewall and under trim before replacing the fuse. Crutchfield’s guide to car amplifier power wire fuses explains why the fuse belongs as close to the battery as possible.
If power is present but the voltage drops sharply when bass plays, look at the ground. It should be a short cable bolted to bare, sanded metal with a star washer, not a seat bolt or painted panel. A loose or corroded ground is the most common cause of a subwoofer cutting in and out.
Step 2: Check the Signal and Head Unit Settings
If the amplifier powers on but the subwoofer stays silent, check the signal path. Confirm the RCA cables are firmly seated at both ends, and swap in a known-good pair if you have one. Then check the head unit settings, because a subwoofer output that is switched off or turned to its lowest level looks exactly like a dead subwoofer.
- Make sure the head unit’s subwoofer output is on and its level is at or above the midpoint.
- Check that the head unit’s own subwoofer crossover is not set so low that almost nothing passes.
- On factory stereos, check the line output converter’s connections and gain.
- Try a different source and a track you know has strong bass.
A quick way to isolate the fault is to plug the subwoofer amplifier’s RCA inputs into a working front or rear output. If the subwoofer plays, the problem is upstream at the head unit or its subwoofer output.
Step 3: Check the Amplifier and Protect Mode
If the amplifier’s protect light is on, it has shut its output down to prevent damage. The most common triggers are a speaker wire shorted to the car body, a total impedance below what the amplifier is stable at, overheating, and low supply voltage from a bad ground or undersized power wire.
Disconnect the speaker wires from the amplifier and turn the system on. If the protect light clears, the problem is in the speaker wiring or the subwoofer; if it stays on, the amplifier or its power supply is at fault. Inspect speaker wire where it passes near screws, seat rails and box edges, because a single stray strand touching metal is enough.
Check the wiring against your amplifier’s minimum impedance. Two dual 2-ohm subwoofers wired all in parallel present 0.5 ohms, which will send most amplifiers into protect mode. Our guide on how to choose a subwoofer for your car includes a wiring table for common single and dual voice coil setups.
Step 4: Test the Voice Coil With a Multimeter
Test the subwoofer’s voice coil by disconnecting it from the amplifier and measuring resistance across its terminals with a multimeter on the ohms setting. A healthy coil reads a little below its nominal impedance; a reading of OL (open line) means the coil is broken, and a reading near zero means it is shorted.
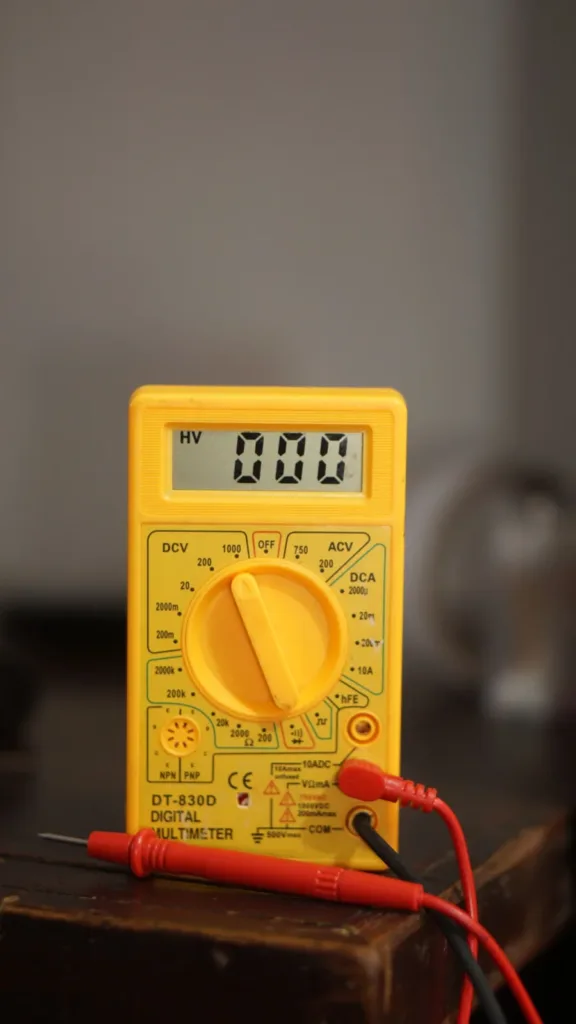
The DC resistance (Re) of a coil is always lower than its nominal rating. JL Audio’s 4-ohm 10W3v3 has an Re of 3.6 ohms, and its 2-ohm 12W3v3 has an Re of 1.7 ohms (Loudspeaker Database, 2026). As a rule, a 4-ohm coil reading between about 3 and 3.6 ohms is healthy, and a 2-ohm coil should read roughly 1.4 to 1.8 ohms.
| Reading on a 4-ohm coil | What it means | What to do |
|---|---|---|
| About 3 to 3.6 ohms | Coil is electrically healthy | Check the cone, surround and amplifier |
| OL or infinite | Open circuit; coil or lead wire is broken | Recone or replace the subwoofer |
| Below about 1 ohm | Shorted coil | Recone or replace; stop using it now |
| Jumps around as you press the cone | Intermittent break in a lead wire | Recone or replace |
On a dual voice coil subwoofer, test each coil separately. One healthy coil and one open coil will still play, but quietly, and the amplifier will see the wrong load. If the coil reads correctly, gently press the cone down evenly with both hands: it should move smoothly and silently. A scraping or grinding feel means the voice coil is rubbing, usually because it has overheated and deformed, and that also requires a recone or replacement.
Step 5: Inspect the Cone, Surround and Spider
With the subwoofer out of the box, inspect the cone, the surround (the flexible rubber or foam ring around the cone) and the spider (the fabric suspension behind the cone). Tears, separations and a cone that sits tilted are all visible causes of distortion and rattling.
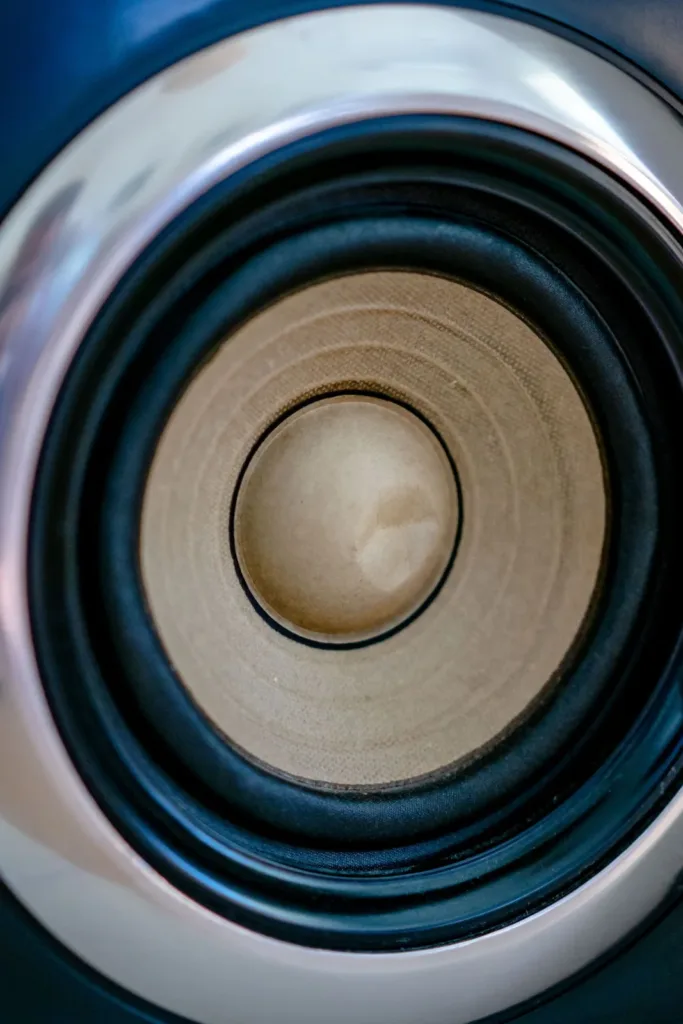
Look for these signs:
- A torn or cracked surround, which causes a flapping or “farting” sound on deep notes.
- A surround separating from the cone or the frame, where the glue joint has failed.
- A cone that sits off-center or tilted, which usually means the spider is damaged.
- A punctured or creased cone.
- A loose dust cap, which buzzes at certain frequencies.
How to repair a torn surround or small cone tear
Small tears in a rubber surround or a paper or polypropylene cone can be repaired with a flexible adhesive. iFixit’s subwoofer rubber surround repair guide rates the job low to moderate difficulty and uses RTV silicone applied to both sides of the tear.
- Remove the subwoofer from the enclosure and lay it face up on a clean surface.
- Clean around the tear with isopropyl alcohol and let it dry.
- Apply a thin layer of RTV silicone to the back of the tear, pressing the edges together.
- Once it skins over, apply a second thin layer on the front, feathering it past the tear.
- Let it cure fully, usually 24 hours, before reinstalling and playing at low volume first.
Thin layers matter. A thick patch adds weight to one side of the cone and can make it wobble. For large tears, missing pieces or a foam surround that has rotted all the way around, a replacement surround kit or a new subwoofer is the better fix.
Step 6: Check the Enclosure for Leaks and Loose Parts
If the subwoofer tests healthy but still sounds wrong in its box, check the enclosure. Air leaks, loose mounting screws and a loose terminal cup all make a sealed or ported box sound flabby or noisy.
Play a low test tone at moderate volume and run your hand along every seam, the terminal cup and the driver’s mounting ring. Any air movement you feel is a leak. Seal seams with silicone from the inside, add a foam gasket under the driver, and tighten the mounting screws evenly in a star pattern.
If the box is fine but the trunk around it buzzes, the problem is vibration rather than a fault. Our guide on how to stop subwoofer vibration in your car covers finding and damping those rattles.
Should You Repair or Replace the Subwoofer?
Repair a subwoofer when the fault is external (wiring, fuse, surround tear or a loose part) or when a recone kit is available for a higher-end model. Replace it when the voice coil is burned or rubbing on a budget driver, because a recone often costs close to a new subwoofer.
| Fault | DIY repair? | Usual best option |
|---|---|---|
| Blown fuse, loose ground, bad RCA | Yes | Repair the wiring |
| Small surround tear | Yes | RTV or flexible adhesive repair |
| Rotted or badly torn surround | Yes, with a kit | Replacement surround kit |
| Open or shorted voice coil | Advanced | Recone kit (premium subs) or replace |
| Voice coil rubbing | Advanced | Recone kit or replace |
| Cracked frame or damaged magnet | No | Replace the subwoofer |
If you replace the driver, measure the old one first so the new one fits the existing box. Our guide on how to measure sub size shows how to take the cutout and mounting depth. Our list of the best car subwoofers of 2026 covers replacements at several price points.
How to Keep Your Subwoofer From Failing Again
Most subwoofers fail from heat, and most of that heat comes from a clipping amplifier or too much bass boost. Set the system up so the subwoofer gets clean power and never plays notes its box cannot control.
- Set the gain with a test tone and a multimeter, not by ear at full volume.
- Keep bass boost at zero; it pushes the amplifier into clipping at 40 to 45 Hz.
- Use a subsonic filter at about 80% of a ported box’s tuning frequency, for example 28 Hz for a 35 Hz box (AudioControl, 2026).
- Match amplifier RMS power at your final impedance to the subwoofer’s RMS rating.
- Back off the volume as soon as you hear distortion.
Amplifiers rated to CTA-2006, which measures continuous power at 14.4 volts and no more than 1% distortion (Rockford Fosgate, 2026), are easier to match honestly. Our guide on how to get deep bass from a car subwoofer covers gain, crossover and subsonic settings in full.
Frequently Asked Questions About Fixing a Car Subwoofer
How do I know if my car subwoofer is blown?
Disconnect it and measure the terminals with a multimeter on ohms. A reading of OL or infinity means the coil is open and the subwoofer is blown. Other signs include a scraping feel when you press the cone, a burning smell, or distorted, weak output even at low volume.
Why is my subwoofer not working but my speakers are?
The subwoofer usually has its own amplifier, fuse, remote wire and RCA cable, so any of those can fail while the door speakers keep playing. Check for the amplifier’s power light, the remote turn-on voltage, the RCA connection and the head unit’s subwoofer output setting.
Why does my amplifier keep going into protect mode?
The usual causes are a speaker wire touching metal, a load below the amplifier’s stable impedance, overheating, or low voltage from a poor ground. Disconnect the speaker wires; if protect clears, the fault is in the wiring or the subwoofer.
Can a blown subwoofer be fixed?
Often, yes. Surround tears can be glued and rotted surrounds replaced with a kit. A burned or rubbing voice coil needs a recone kit, which many premium brands sell. On budget subwoofers, replacing the driver is usually cheaper and faster than reconing.
What should a 4-ohm subwoofer read on a multimeter?
A healthy 4-ohm coil usually reads about 3 to 3.6 ohms of DC resistance. JL Audio’s 4-ohm 10W3v3, for example, has an Re of 3.6 ohms (Loudspeaker Database, 2026). OL means an open coil, and near zero means a short.
Why does my subwoofer sound distorted?
Distortion usually comes from amplifier clipping (gain too high or bass boost on), a torn surround, or a voice coil starting to rub. Turn off bass boost and reset the gain first. If the distortion remains at low volume, inspect the surround and test the coil.
Can I fix a subwoofer with a hole in the cone?
A small hole or tear in a paper or polypropylene cone can be sealed with a thin layer of flexible adhesive applied to both sides. Keep the repair light so the cone stays balanced. Large holes or creases affect how the cone moves and are better solved with a recone or a new subwoofer.
Summary: How to Fix a Subwoofer in Your Car
- Check power, ground, fuses and the remote wire before touching the subwoofer.
- Confirm the RCA signal and head unit subwoofer settings.
- Clear protect mode by finding shorts and impedance mismatches.
- Test the voice coil with a multimeter, then inspect the cone and surround.
- Repair small tears and wiring faults yourself; recone or replace a burned coil.